Ventura comes with 3 pre-designed Bloom Optin forms.
To import the Bloom forms you must have Bloom installed which is not included with this child theme.
With Bloom installed, in the WordPress admin panel navigate to Bloom>Import & Export, select ‘Choose File’ under ‘Import Bloom Settings’ and select the file called ventura-bloom-settings.json from your computer, then click on import.
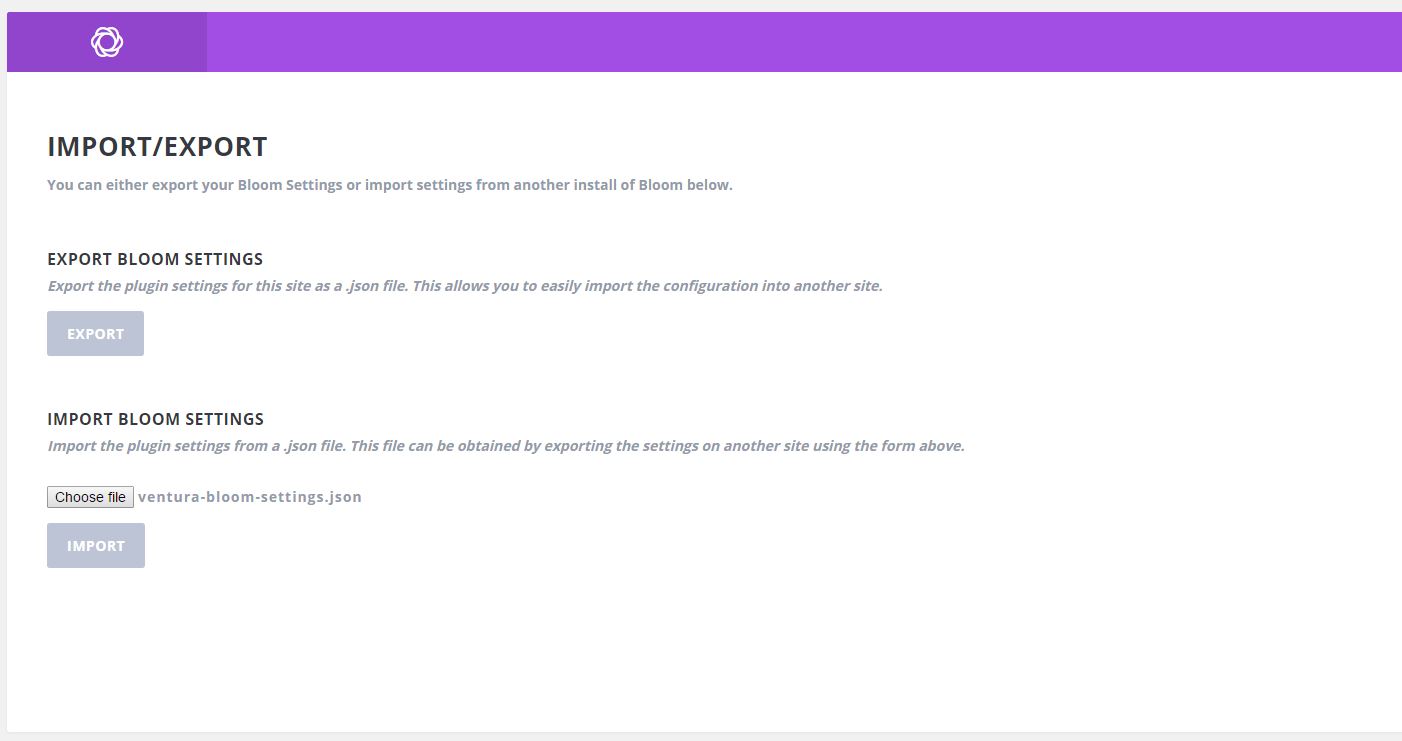
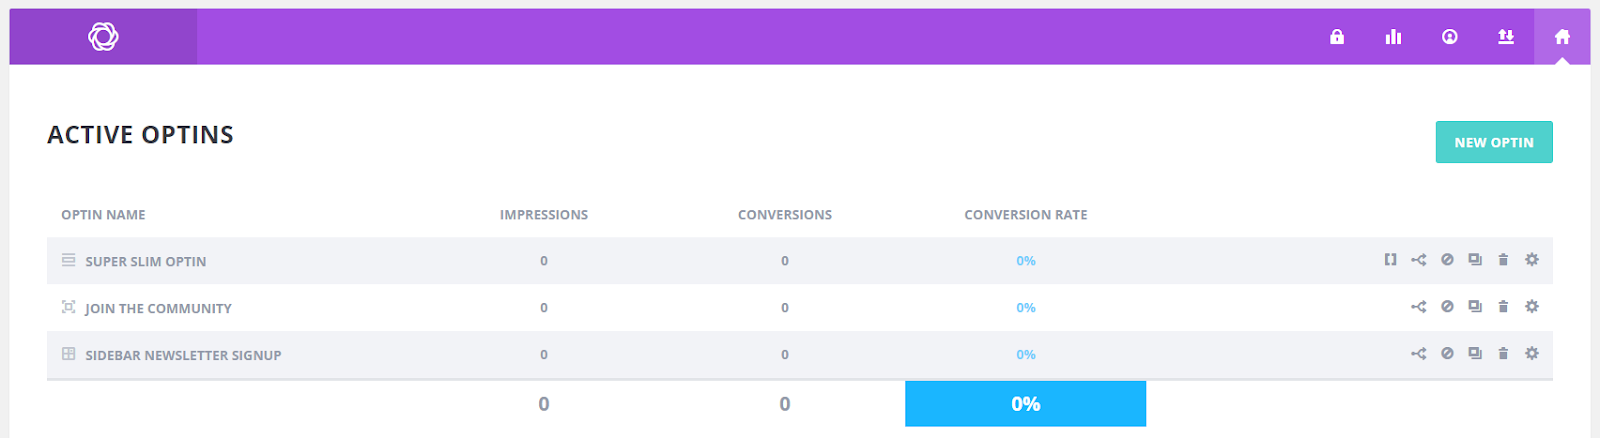
You should get a message saying the import was successful, next click on Bloom>Optin Forms and you will see 3 forms in the Inactive Optins section. You need to make sure you have added your account details for your email service provider to the Bloom settings and then selected a list for each of the three forms.
Next click on the tick next to each form to activate them and they will move up into the Active Optins section.
The forms should now be active in the footer and on the Community page as a popup from the Get Instant Access buttons.
To add the sidebar optin to the blog pages, navigate to ‘Appearance>widgets’, select ‘Bloom’ from the widget options and drag it to the ‘Sidebar’, then select ‘Sidebar newsletter signup’ from the dropdown list and do not add a heading. Be sure to Save.

You should now see the optin in the blog sidebar
